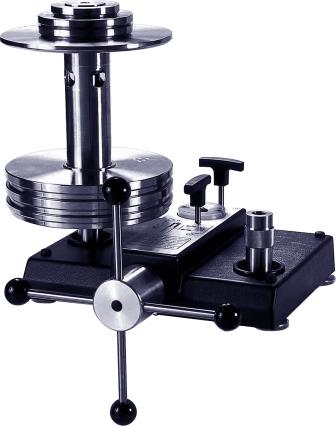
Hydraulic Dead-weight Testers
What we offer?
These Testers are offered in eight pressure ranges, when fitted with one of the six precision piston units: BGH600, BGH120, BGH300, BGH700, BGH1200, BGH1400, BGH2600 & BGH4000, from 1 to 4000 bar (60 000 lb/in²).
All the models have a similar-style base except for 40 bar, 2600 bar and 4000 bar which have dedicated pressure bases.
Budenberg Gauge Co. Ltd. manufactures calibration products in Altrincham, Cheshire (UK). Any other manufacturers claiming manufacturing Budenberg Dead-weight Testers or proposing their manufactured Testers as “Budenberg” are not offering genuine Budenberg products.
All Budenberg Testers are marked with Budenberg Logo as shown below. Look for Budenberg logo for genuine Budenberg Dead-Weight Testers and Master Test Gauges.
These Testers are available in seven pressure ranges, when fitted with one of the precision piston units: BGH120, BGH300, BGH700, BGH1200, BGH1400, BGH2600 and BGH4000, from 1 to 4000 bar (60 000 lb/in²). With the exception of the BGH2600 and BGH4000, all models have a same base.
Application
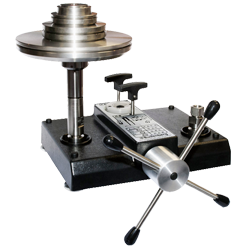
The hydraulic Dead-Weight Tester is a simple high accuracy instrument for the calibration of pressure gauges and pressure transducers. The tester is compact and all materials have been chosen to give a long trouble-free life and to maintain a clean appearance. Accuracy and ease of use are prime features of these well proven testers.
These testers are primary standards for the calibration of instrumentation on oil over a wide range of pressures. The models with dual range piston units are particularly useful as they cover a wide range without change of piston unit.
These testers are often used for calibrating transmitters, oxygen gauges (with special fluids and accessories), gauges, pressure switches, PRVs and transducers where oil is used as the medium of operation.
Construction
All working parts of the tester are mounted on a stable anodised aluminium base which has four adjustable levelling screws at the corners. The ABS cover is retained by four screws and carries an instruction plate on the raised portion. The oil reservoir has a transparent cover and can easily be filled.
Twin Area Screw Pump
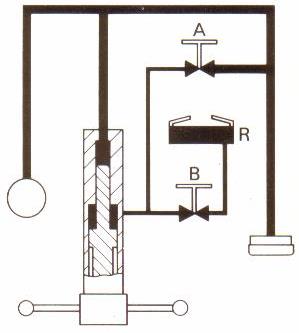
When operated with valve ‘A’ open and valve ‘B’ closed the large diameter ram generates pressures up to 140 bar (2000 lb/in²) quickly. When operated with valve ‘B’ open and valve ‘A’ closed the small diameter ram builds up higher pressures easily and small adjustments are readily made.
The stainless steel pump spindle has a rolled trapezoidal thread and the thrust is taken by a needle thrust bearing to cut down effort required. The brass high pressure block in the pump contains valves ‘A’ and ‘B’ and the oil reservoir. From this block stainless steel pipes lead to the piston unit and gauge stand.
Piston Unit
The Piston unit is the heart of the dead-weight testers and the key to its performance. The effective area of each piston unit is assessed by comparison with a master unit. Budenberg’s decades of expertise in manufacturing piston cylinder units to the tightest tolerances and high accuracy pressure measurement are widely recognised by industry throughout the world.
Many of the pistons are made of tungsten carbide which is both extremely hard and water resistant. The homogeneity of tungsten carbide permits ultra-precise finishing of the piston. The deviation from the ideal geometry is < 0.0001mm.
There are different size BGH piston units ranging from 1/16 in² to 1/160 in². The advantage to the user is in being able to choose the size that fits best to his pressure range requirements.

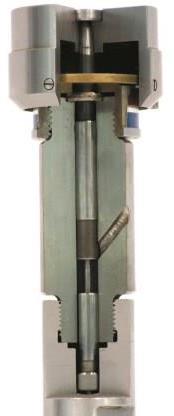
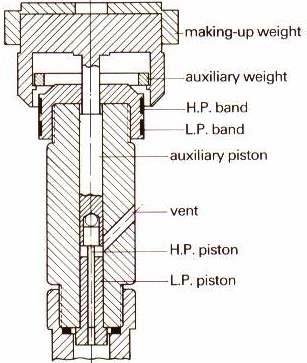
BGH120 and BGH300 are single piston units whereas BGH700, BGH1200, BGH1400 and BGH2600 are with dual range piston units. The dual range piston units as shown above are particularly useful as they cover a wide range starting from 1 bar (10 lb/in²) with automatic changeover from low pressure to high pressure.
Dual Range Piston Working
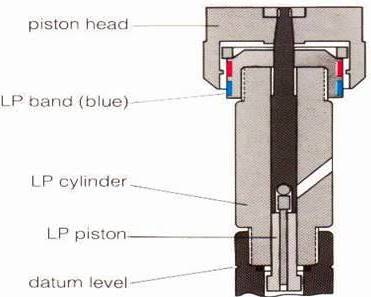
Piston Unit illustrated with LP Piston working and edge of piston head on LP band
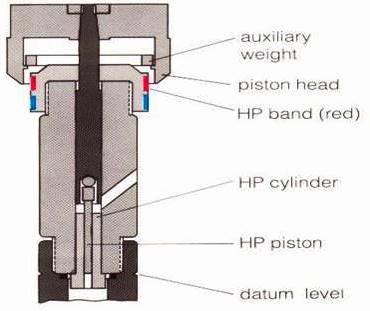
Piston Unit illustrated with HP Piston working and edge of piston head on HP band
Weight Set (Masses)
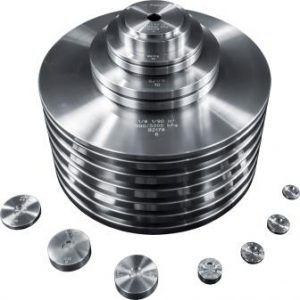
The weights applied to the piston are all manufactured from non-magnetic austenitic stainless steel to close tolerances.
Each weight is marked with set number, pressure and nominal area of the piston unit.
On most testers a “making-up” weight is supplied to be fitted over the piston head to attain the pressure at the start of the range. This must be changed when weights of different pressure units are to be used. The lb/in² weights don’t require “making-up” weight.
Fine Increment weights are applied to piston to give higher (fine) resolution.
Individual Masses on Main Weight set are marked with Budenberg logo.
The picture on the right is for typical Main & Fine Increment weight sets.
Flexibility and interchangeability
A piston unit can be used with sets of weights made for different units of pressure to give the same standard accuracy; thus a user with a tester having bar weights can later buy a set of lb/in² weights and can then calibrate instruments in lb/in² units with the same accuracy as with the original bar weights.
The base is the same for all models of the tester whether high or low range and if the base is fitted with an additional pressure gauge connection in place of the piston unit the tester can be used to compare the instrument being calibrated with a Standard Test Gauge (this is Pressure Comparator Model BGH1200C)
Accuracy
The standard accuracy for each model is that of the pressure generated by tester at a temperature of 20°C subject to gravity of internationally agreed standard value (9.80665 m/s²). The masses of all the weights and the area of the piston unit are traceable to National Standards originating at the National Physical Laboratory.
Higher Accuracy (UKAS)
If higher accuracy is required, all testers are available with Class ‘A’ Certificates. These certificates allow user to attain a higher accuracy by providing the exact figure for the area of the piston unit supplied across its pressure range and the figures for the mass of each individual weight. Most of the accuracies are improved by a factor of 2 over standard accuracy.
All Class ‘A’ testers are supplied with UKAS Area for Piston unit and UKAS Mass for each individual weight. The Class ‘A’ accuracy software is supplied for correction of Piston unit temperature, Pressure Head, Ambient Pressure, Ambient Temperature and local gravity.
Tool Roll and Instructions
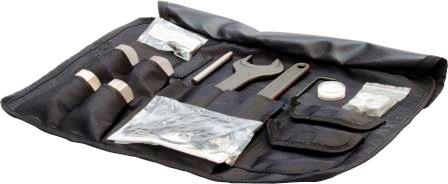
The tool roll contains 1/8″, ¼”, 3/8”, and ½” BSP Stainless steel connections, Spirit level, 4 feet for fitting to bench, a bag of spare seals, two spanners, pointer remover and punch, and Operator Manual with Certificate of Accuracy.
Angle connection for flush mounting gauges and dual gauge stand are supplied (if ordered separately), ¼”, 3/8”, and 2x½” NPT connections are supplied as alternatives to (or in addition to) BSP connections. Metric (M12 and M20) and other special connections are also available.
Special Applications
For Calibration of Oxygen gauges, the tester base degreased to make it suitable for calibrating oil free instruments particularly gauges used on Oxygen. An inert fluid (such as Fomblin) is used instead of mineral oil.
Optional Accessories
The testers are supplied with following accessories if ordered separately.
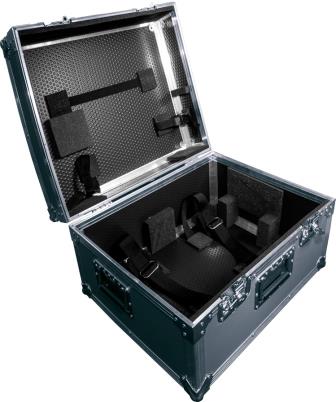
Base Carrying Case
Model 433 Weather Proof Hard ABS Laboratory Storage / carrying case
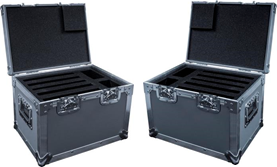
Weights Carrying Cases
Model 436/1/2 Weather Proof Hard ABS Laboratory Storage / carrying cases
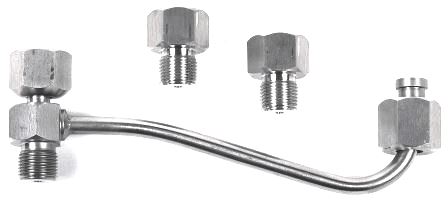
Dual Gauge Stand Fig 27
for testing of two gauges simultaneous against Test Gauge or Dead-weight Tester
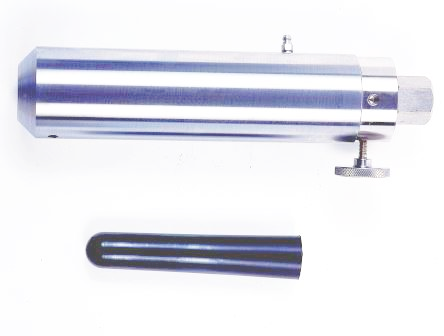
Liquid / Liquid Interface
Model 38, up to 700 bar (10 000 lb/in²) for Calibration of non-oil gauges and transducers
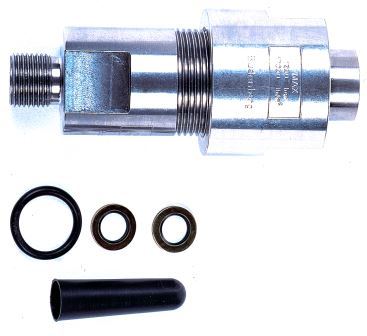
Liquid/Liquid Interface
Model 25, up to 1000 bar (15 000 lb/in²) for Calibration of non-oil gauges and transducers
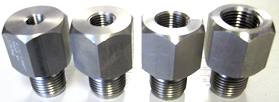
NPT Connectors
1/4”, 3/8”, 2x½” NPT set. BSP and Metric Connectors are also available. Refer packing details
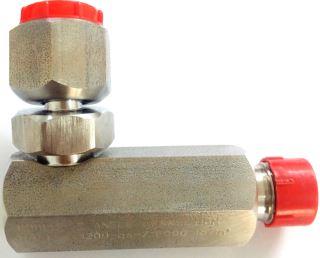
Angle Connector Fig 23
for Calibrating back connection / flush panel Gauges on Pressure Comparator / Dead-weight Tester
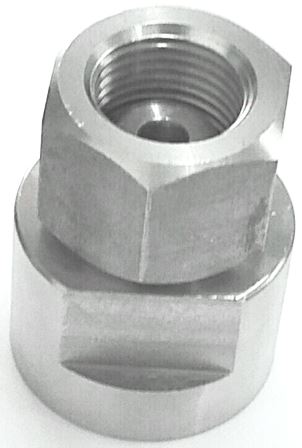
Single Gauge Stand
1/2" BSPM Swivel connection for Gauges under test. One supplied with Tester as standard
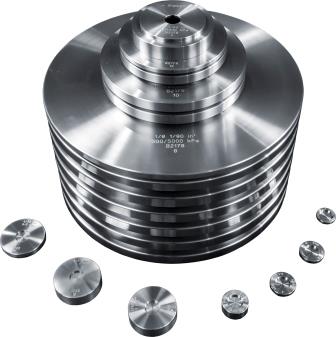
Additional Weight sets
Non-austenitic St. Steel weights are supplied in inW, mWater, bar, lb/in², kg/cm², kpa, Mpa etc as ordered.
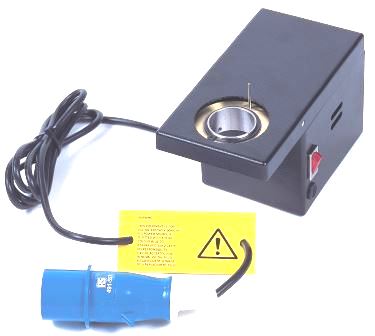
Power Rotation Unit
Fig 29 is used for continuous rotation of the weights on 700bar and above for precision.
Fig 29 Power Rotation Unit Application
When the piston unit of a dead weight tester is working the piston should rotate in the cylinder. Normally, the weights on the piston are spun by hand and continues to spin for several minutes. This practice is satisfactory for most calibration requirements, and the full accuracy of the tester is attained.
In some laboratories it is necessary to maintain a steady pressure for calibration of equipment or for an experiment lasting an hour or two when it is tiresome to rotate the weights by hand. The unit can readily be fitted to existing testers or removed if not required.
The Hydraulic Dead-Weight Tester Piston units are available in seven standard pressure ranges. Pressure Range extends from 1 to 4000 bar (60 000 lb/in²). Special Ranges are available on request.
Model
Pressure Ranges / Units
Datasheet
Note: The Pressure ranges / units mentioned are standard ranges. Testers with custom Pressure Ranges / units are also supplied.
Budenberg Dead-weight Testers are supplied with the following specifications and accessories: –
Tester Base
The base has two Union Connectors (two high Pressure Cone Joint Connectors for BGH2600), One for Piston Cylinder Unit and One for Instrument to be Calibrated.
Aluminium base with ABS cover and four Adjustable feet for levelling. Twin area screw pump with needle thrust and axially located hand wheel for easy operation at high pressure.
Weights (Masses)
The different weights are manufactured from non-magnetic austenitic stainless steel for each piston units. Each weight is marked with set number, pressure and nominal area of the piston unit. Individual weights are marked with Budenberg logo. look for![]() logo on each mass in the main weight set.
logo on each mass in the main weight set.
Fine Increment weights are supplied (if ordered separately) for higher resolution.
Accuracy
Standard Accuracy up to 0.015% of reading
Class A Accuracy from 3 bar to full range up to 55ppm (0.0055% of reading)
Software
Accuracy software is available with Class ‘A’ accuracy (UKAS Area & Mass Certification) only for correction of Piston unit temperature, Pressure Head, Ambient Pressure, Ambient Temperature & local gravity.
Standard Accessories
Tool Roll containing 2 Spanners, Spirit level, 4 Level plates, Bag of seals, Pointer Punch, Pointer Remover, 500ml VG22 Oil, and ½“, 3/8”, ¼”,BSP or NPT adaptor set (as ordered), Single Gauge Stand, Operation Manual with Certificate of Accuracy (UKAS Certificate if ordered).
Optional Accessories
Fine Increment Weight Set, Dual Gauge Stand, ½”BSP Angle Connection, Set of BSP and Metric Adaptors, Liquid / Liquid Interface (Oil Seal), Set of Weather Proof Hard ABS Storage / Carrying case for Tester Base & Weights.
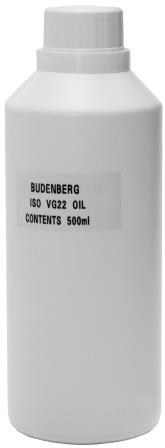
The BGH series tester cartons should contain:-
1 – BGH series base
1 – Gauge stand
1 – 500 ml bottle of oil
4 – Hand wheel spokes
1 – Piston/Cylinder unit (as specified in your order)
1 – Set of weights supplied in separate cartons
1 – make-up weight in bar or kg/cm² or kPa (if these ranges are ordered)
1 – Certificate of accuracy
1 – UKAS Area & Mass Certificate for Class ‘A’ tester (if ordered)
1 – Class ‘A’ Accuracy software (with Class ‘A’ Tester)
1 – Tool Roll containing:-
1 – Hexagon wrench key 3 mm A/F
2 – 30 mm A/F Open ended Spanners
1 – Spirit level
4 – Level plates
1 – Bag of start up seals
1 – G1/2 (1/2” BSP) angle connection (If ordered separately)
1 – Pointer punch
1 – Pointer remover
1 – Soft copy of the O & M instructions on Pen Drive
1 – Set of Connections (as ordered)
N.P.T
1 – ½” BSP(M) x ¼” NPTF
1 – ½” BSP(M) x 3/8” NPTF
2 – ½” BSP(M) x ½” NPTF
B.S.P
1 – ½” BSPM x 1/8″ BSPF
1 – ½” BSPM x ¼” BSPF
1 – ½” BSPM x 3/8” BSPF
1 – ½” BSPM x ½” BSPF
METRIC
1 – ½” BSPM x M20 X 1.5
1 – ½” BSPM x M12 X 1.5
The BGH 2600 tester cartons should contain:-
1 – BGH 2600 base
1 – 500 ml bottle of oil
4 – Hand wheel spokes
1 – BGH 2600 Piston/Cylinder unit and overhang
1 – Set of weights supplied in separate cartons
1 – make-up weight in bar or kg/cm² or kPa (if these ranges are ordered)
1 – lb/in² PCU height adaptor with lb/in² weight set
1 – Certificate of accuracy
1 – UKAS Certificate for Class ‘A’ tester (if ordered)
1 – Class ‘A’ Accuracy software (with Class ‘A’ Tester)
1 – Tool Roll containing:-
1 – Hexagon wrench key 3 mm A/F
2 – 30 mm A/F Open ended Spanners
1 – Spirit level
5 – Level plates
1 – Bag of startup seals
1 – G1/2 (1/2” BSP) angle connection (If ordered separately)
1 – Pointer punch
1 – Pointer remover
1 – G1/2 differential connection
1 – G3/8 differential connection
2 – Cone joint (recessed) – If ordered separately
1 – Cone joint (plain)
1 – Soft copy of the O & M instructions on Pen Drive
1 – Set of Connections (if ordered separately)
N.P.T
1 – ½” BSP(M) x ¼” NPTF
1 – ½” BSP(M) x 3/8” NPTF
2 – ½” BSP(M) x ½” NPTF
B.S.P
1 – ½” BSPM x 1/8″ BSPF
1 – ½” BSPM x ¼” BSPF
1 – ½” BSPM x 3/8” BSPF
1 – ½” BSPM x ½” BSPF
METRIC
1 – ½” BSPM x M20 X 1.5
1 – ½” BSPM x M12 X 1.5


