pneumatic dead-weight testers
What we offer?
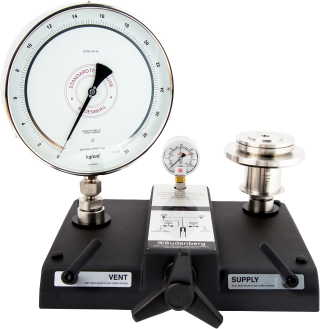
The Pneumatic Dead-Weight Testers are offered in five pressure ranges, when fitted with one of the five precision piston units: BGP1, BGP7, BGP25, BGP70, and BGP120, in all, they cover from -1 to 120 bar (1600 lb/in²).
All the five models have a common base.
The Pneumatic Dead-Weight Testers are available in five pressure ranges, when fitted with one of the five precision piston units: BGP1, BGP7, BGP25, BGP70, and BGP120, in all, they cover from -1 to 120 bar (1600 lb/in²). All the models have a common base.
Application
These testers are primary standards for the calibration of instrumentation on clean gases over a wide range of pressures. They are used when oil dead-weight testers are unsuitable, that is where the oil in the pressure gauge could cause errors by weighing down the Bourdon tube, or could contaminate the pressure medium when the instrument is later used, or could cause a hazard when the instrument is to be used on pure gases applications.
Liquid from an oil dead-weight tester can choke small valves or pipes in a pneumatic control system. Pneumatic (air) testers give greater accuracy than oil testers at pressures below 6 bar (90 lb/in²) and can operate on pressures down to 15mbar, whereas hydraulic (oil) are not satisfactory at pressure below 1 bar (15 lb/in²).
These testers are often used for calibrating d.p. cells (as used in flow measurement), hydrostatic depth transmitters, gauges and transducers for use in pneumatic control systems, gauges and transducers for use on medical gases.
Construction
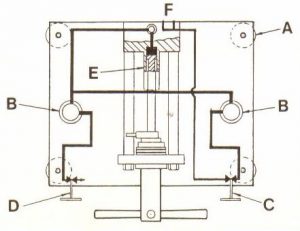
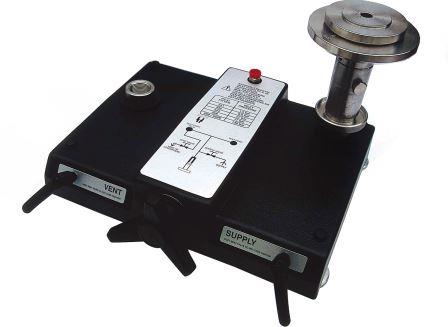
All working parts of the tester are fitted to an aluminium base with four adjustable feet (A) for levelling. The components are of brass or stainless steel and are connected by copper piping with Swagelok brass couplings.
There are two test connections (B); the piston unit is normally fitted to the one on the left and a union for the instrument to be calibrated to the one on the right. One needle valve (C) admits air into the system from inlet (F) and the other (D) vents the system to atmosphere. A volume adjuster ((E) is fitted to make the fine adjustments of pressure; the brass barrel, and a ball bearing ensures that even at high pressures it is easy to use.
A gauge is fitted to the adjuster block to show the approximate inlet pressure.
The two valves are fitted at the convenient angle on the front of the tester; the tester has an ABS cover with instruction plate fixed.
Piston Unit
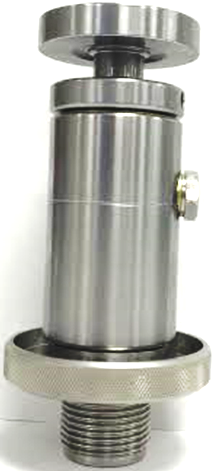
The heart of the tester is the precision piston unit which is machined to the tightest tolerances. The effective area of each unit is assessed by comparison with a master unit. The pistons are made of tungsten carbide which is both extremely hard and water resistant. The unit can easily be dismantled for cleaning (not BGP120 which is oil lubricated)
There are different BGP piston unit sizes ranging from ½ in² to 1/16in². The advantage to the user is in being able to choose the size that fits best to his pressure range requirements.
Weight Set (Masses)
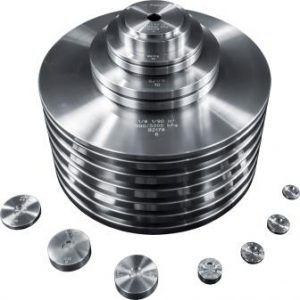
The weights applied to the piston are all manufactured from non-magnetic austenitic stainless steel to close tolerances.
Each weight is marked with set number, pressure and nominal area of the piston unit.
On most testers a “making-up” weight is supplied to be fitted over the piston head to attain the pressure at the start of the range. This must be changed when weights of different pressure units are to be used. The lb/in² weights don’t require “making-up” weight.
Fine Increment weights are applied to piston to give higher (fine) resolution.
Individual Masses on Main Weight set are marked with Budenberg logo.
The picture on the right is for typical Main & Fine Increment weight sets.
Flexibility and interchangeability
A piston unit can be used with sets of weights made for different units of pressure to give the same standard accuracy; thus a user with a tester having bar weights can later buy a set of lb/in² weights and can the calibrate instruments in lb/in² units with the same accuracy as with the original bar weights.
The base is the same for all models of the tester whether high or low range and if the base is fitted with an additional pressure gauge connection in place of the piston unit the tester can be used to compare the instrument being calibrated with a Standard Test Gauge (this is Pressure Comparator Model BGP120C)
Cleanliness
The tester is supplied free of oil and water, but valves and volume adjuster are lubricated with grease.
The Model BGP120 piston unit is oil lubricated with air pressure applied to surface oil.
Accuracy
The standard accuracy for each model is that of the pressure generated by tester at a temperature of 20°C subject to gravity of internationally agreed standard value (9.80665 m/s²). The masses of all the weights and the area of the piston unit are traceable to National Standards originating at the National Physical Laboratory.
Higher Accuracy (UKAS)
If higher accuracy is required, all testers are available with Class ‘A’ Certificates. These certificates allow user to attain a higher accuracy by providing the exact figure for the area of the piston unit supplied and the figures for the mass of each individual weight. Most of the accuracies are improved by a factor of 2 over standard accuracy.
All Class ‘A’ testers are supplied with UKAS Area for Piston unit and UKAS Mass for each individual weight.
Tool Roll and Instructions
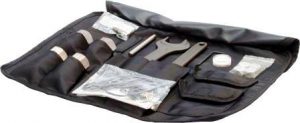
The tool roll contains 1/8″, ¼”, 3/8”, and ½” BSP Stainless steel connections, Spirit level, 4 feet for fitting to bench, a bag of spare seals, two spanners, pointer remover and punch and Operator Manual with Certificate of Accuracy.
Angle connection for flush mounting gauges and dual gauge stand are supplied (if ordered separately), NPT connections are supplied as alternatives to (or in addition to) BSP connections.
Installing the tester
The tester has pressure entries at the back screwed internally ¼” BSP. The tester should be used on nitrogen or alternatively on suitably filtered dry oil-free compressed air. The user should fit a reducing valve to maintain the inlet pressure to a figure slightly higher than the highest pressure of the model being used.
Optional Accessories
The testers are supplied with following accessories, if ordered separately.
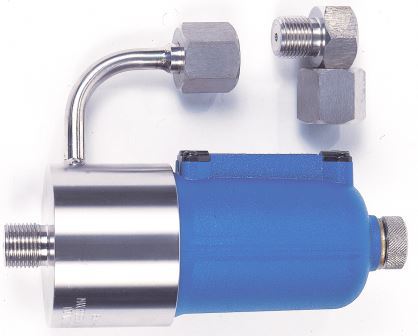
Fig 35 Air / Liquid Interface
is used to calibrate hydraulic gauges on pneumatic testers up to 25 bar
Model 35 Low Pressure AIR/LIQUID INTERFACE
When a low pressure Test Quality Gauge which is intended for use on liquids need to be calibrated, it must be calibrated on liquid otherwise if calibrated on air it will show an error when used due to the weight of liquid in the tube.
The Model 35 Low Pressure Air / Liquid interface is designed to enable laboratories, instrument calibration departments, etc. to calibrate instruments up to 25 bar (400 lb/in²) on liquid (liquids which attack Nitrile Rubber Seals cannot be used) using an air dead-weight tester which is more accurate and will operate at much lower pressures than an oil dead-weight tester.
The unit is made of stainless steel. A loose union connection is provided to which the instrument under test is connected.
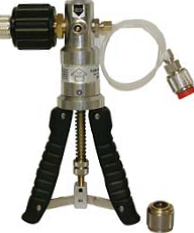
Vacuum / Pressure Pump
BG40 Combined Vacuum / Pressure Hand Pump is used to generate pressure for BGP1 and BGP7
BG40 Vacuum / Pressure Pump
This pump enables the tester to be used when no clean air or gas is available from the compressor or Nitrogen cylinder. The tester can be used in a workshop or taken to calibrate an instrument in a panel or on-site.
The pump hose connection can be screwed into Model 27, two Gauge stand; alternatively, it can be screwed into a gauge connection or to tester inlet connection. The pump generates pressure up to 40 bar (600 lb/in²) and screw-press (volume regulator) is used for fine adjustment of pressure
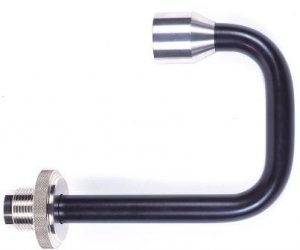
Model 24 Vacuum Adaptor
for use on Model BGP1 with BG40 vacuum pump. Model 24 Vacuum Adaptor enables the piston unit of Model BGP1 to be mounted upside down and so (with annular weights) to operate at a pressure under atmospheric that is vacuum.
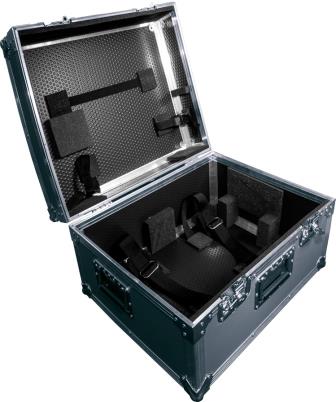
Tester Base Carrying Case
Model 433 Weather Proof Hard ABS Storage / carrying case for BGP Series Tester Base & Comparators
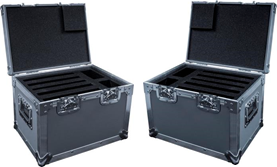
Weight Set Carrying Cases
Model 436/1/2 Weather Proof Hard ABS Storage / carrying cases for BGP Series Tester weights (except BGP1)
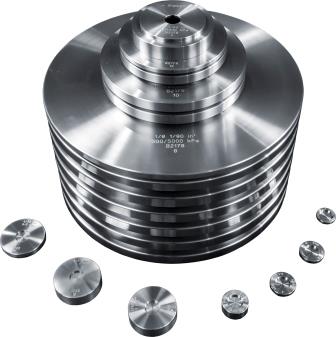
Additional Weight sets
Testers are supplied with additional weight sets in bar, lb/in², kg/cm², kPa, MPa etc as required
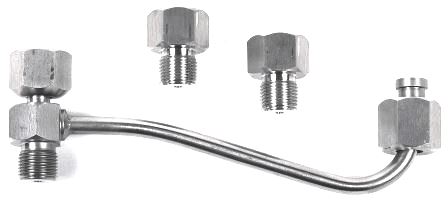
Dual Gauge Stand Fig27
for testing two gauges simultaneously or both together against piston unit
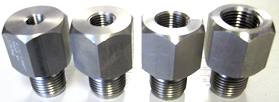
NPT Connector set
Additional adaptor set 1/4”, 3/8”, 2x½” NPT. BSP and Metric adaptors sets are also supplied as required.
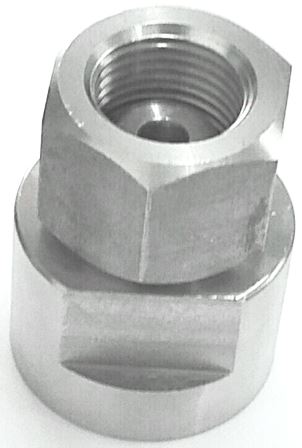
Single Gauge Stand
Swivel Connector for connecting Gauge under test. 1 off supplied as standard with Testers.
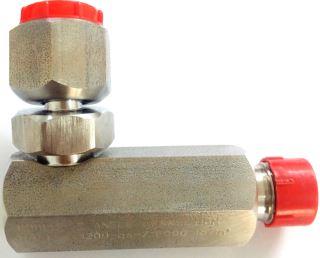
Angle Connector Fig 23
With 1/2"BSP swivel connection for gauges for Calibrating back connection / flush panel Gauges
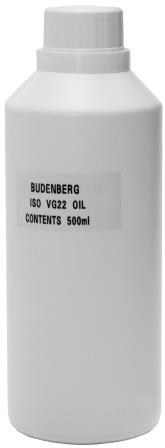
ISO VG22 Mineral Oil
Supplied in 500 ml bottle for lubrication of Piston Cylinder with BGP70 and BGP120 Tester only
The Pneumatic Dead-Weight Tester Piston units are available in five pressure ranges. Pressure Range extends from vacuum (-1) bar to 120 bar (1600 lb/in²).
Model
Pressure Ranges / Units
Datasheet
Note: The Pressure ranges / units mentioned are standard ranges. Testers with custom Pressure Ranges / units are also supplied.
Budenberg Dead-weight Testers are supplied with the following specifications and accessories: –
Tester Base
With ABS cover, all working parts of the tester are fitted to the aluminium base with four adjustable feet for levelling. There are two Union Connectors, One for Piston Cylinder Unit and One for the Instrument to be Calibrated.
Two Precision soft-seat valves are fitted, one valve admits air into the system from the inlet and the other vents the system to the atmosphere. The Screw Press (Volume adjuster) is fitted to make fine adjustments to the Pressure / Vacuum.
The base requires an external Gas supply slightly above test Pressure. The entry port ¼” BSP Female is at the back. A safety pattern gauge is fitted to show the approximate inlet pressure.
Weights (Masses)
The different weights are manufactured from non-magnetic austenitic stainless steel for each piston units. Each weight is marked with set number, pressure and nominal area of the piston unit. Individual weights are marked with Budenberg logo. Look for![]() logo on each mass in the main weight set as shown.
logo on each mass in the main weight set as shown.
Fine Increment weights are supplied (if ordered separately) for higher resolution on BGP7, BGP25, BGP70 and BGP120.
Accuracy
Standard Accuracy up to 0.015% of reading, 0.04% on vacuum
Class A Accuracy up to 55ppm (0.0055% of reading)
Certification
Standard Accuracy Tester is supplied with TRACEABLE Area & Mass Certificate
Class A Accuracy Tester is supplied with UKAS Area & Mass Certificate
Software
Accuracy software is available with Class ‘A’ accuracy only for correction of Piston unit temperature, Pressure Head, Ambient Pressure, Ambient Temperature & local gravity.
Standard Accessories
Tool Roll containing 2 Spanners, Spirit level, 4 Level plates, Bag of seals, Pointer Punch, Pointer Remover, 1 inlet manifold adaptor (if ordered separately), and 2 x ½“, 3/8”, ¼” NPT adaptor set or ½“, 3/8”, ¼”, 1/8″ BSP adaptor set (as ordered), Single Gauge Stand, Soft Copy of the Operation Manual on Pen drive with Certificate of Accuracy (UKAS Certificate if ordered).
Optional Accessories
- Model 24 Vacuum Adaptor to operate BGP1 in Vacuum
- BG40 Vacuum / Pressure Hand Pump for use on BGP1 and BGP7
- Fine Increment Weight Set for BGP7, BGP25, BGP70 and BGP120
- Dual Gauge Stand, ½”BSP Angle Connection, Set of BSP, NPT and Metric Adaptors (M12, M20)
- Model 35 Air / Liquid Interface, Dirt Trap, Set of Weather Proof Hard ABS Storage / Carrying case for Tester Base & Weights.
The BGP series tester cartons should contain:-

1 – BGP series base
1 – Gauge stand
1 – Piston/Cylinder unit (as specified in order)
1 – Set of weights supplied in separate cartons
1 – make-up weight with bar weight set
1 – Certificate of accuracy
1 – UKAS Certificate for Class ‘A’ tester (if ordered)
1 – Class ‘A’ Accuracy software (with Class ‘A’ Tester)
1 – Tool Roll containing:-
1 – Hexagon wrench key 2 mm A/F
1 – Hexagon wrench key 3 mm A/F
2 – 30 mm A/F Open ended Spanners
1 – Spirit level
4 – Level plates
1 – Bag of seals
1 – G1/2 (1/2” BSP) angle connection (If ordered)
1 – Pointer punch
1 – Pointer remover
1 – Inlet manifold adaptor
1 – Soft copy of the O & M instructions on Pen Drive
1 – 500 ml bottle of Oil for BGP 120 only
1 – Set of Connections (as ordered)
N.P.T
1 – ½” BSP(M) x ¼” NPTF
1 – ½” BSP(M) x 3/8” NPTF
2 – ½” BSP(M) x ½” NPTF
B.S.P
1 – ½” BSP(M) x 1/8″ BSPF
1 – ½” BSP(M) x ¼” BSPF
1 – ½” BSP(M) x 3/8” BSPF
1 – ½” BSP(M) x ½” BSPF
METRIC
1 – ½” BSP(M) x M20 X 1.5
1 – ½” BSP(M) x M12 X 1.5

